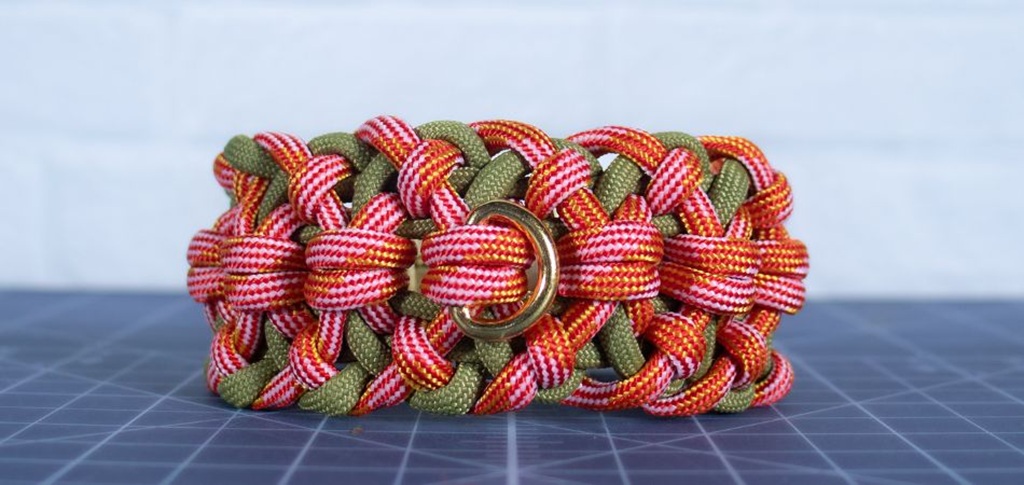
Ditch the Buckle: Your Ultimate Guide to Crafting a 550 Paracord Bracelet Without Hardware
Paracord bracelets are more than just rugged fashion accessories; they are compact survival tools, carrying several feet of incredibly strong and versatile cordage right on your wrist. Traditionally fastened with plastic or metal side-release buckles, there’s a growing appreciation for buckle-free designs. These minimalist bracelets offer unique advantages in comfort, adjustability, and stealth. Whether you dislike the bulk of a buckle, want a fully adjustable fit, or simply enjoy the challenge of pure cord craftsmanship, learning how to make a 550 cord bracelet without a buckle is a rewarding skill.
This comprehensive guide will walk you through the most popular and effective methods for creating stylish and functional buckle-less paracord bracelets. We’ll cover everything from choosing your materials to mastering the specific knotting techniques required for secure and elegant closures. Get ready to elevate your paracord crafting game!
Why Go Buckle-Free with Your Paracord Bracelet?
While buckles are functional, they aren’t always the ideal solution. Opting for a buckle-less design offers several compelling benefits:
- Enhanced Comfort: Without a hard plastic or metal buckle pressing against your skin, especially during activities or while resting your wrist on a surface (like typing), buckle-free bracelets are often more comfortable for continuous wear.
- Superior Adjustability: Certain buckle-less closure methods, particularly those using sliding knots, allow for a much wider range of size adjustments compared to the fixed positions on most buckles. This ensures a perfect fit for any wrist and allows you to wear the bracelet tighter or looser as needed.
- Minimalist Aesthetics: For those who prefer a cleaner, more streamlined look, eliminating the buckle results in a bracelet made purely from cord, showcasing the weave and knot work without interruption.
- Reduced Failure Points: Plastic buckles can become brittle over time or break under stress. Metal buckles can corrode or have moving parts that fail. A well-tied knot closure is incredibly robust and has fewer potential points of failure.
- Stealth and Silence: In tactical or hunting scenarios, the click of a plastic buckle can be undesirable noise. Knot closures are completely silent.
- Resourcefulness: Making a bracelet without needing extra hardware means you can craft one anytime, anywhere, as long as you have cord, scissors, and a lighter.
Gathering Your Essential Supplies
The beauty of buckle-less paracord projects lies in their simplicity. You only need a few basic items:
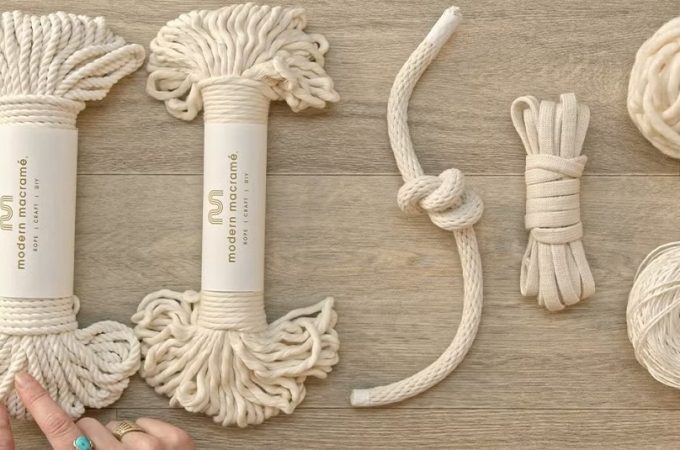
- 550 Paracord: The star of the show! “550” refers to Type III commercial paracord, rated to hold 550 pounds. It typically consists of a woven nylon sheath containing 7 inner strands (which can also be used individually for finer tasks). Choose your favorite color(s).
- Measuring Tape or Ruler: Crucial for accurately measuring your wrist and the cord.
- Sharp Scissors or Knife: For clean cuts through the paracord.
- Lighter: Essential for melting and sealing the cut ends of the paracord to prevent fraying. Use caution when working with an open flame.
Optional but helpful:
- Paracord Jig: A device that holds the bracelet steady while you weave, making it easier to maintain consistent tension. Not essential, especially for buckle-less designs, but can be useful.
- Paracord Needle/Fid: A tool that can help tuck ends or work with intricate weaves, though not typically required for basic buckle-less closures.
Measuring and Cutting Your Cord: Getting the Length Right
Accurate measurement is key to a well-fitting bracelet.
- Measure Your Wrist: Wrap the measuring tape snugly, but not tightly, around your wrist where you intend to wear the bracelet. Note this measurement.
- Calculate Cord Length: A general rule of thumb for standard weaves like the Cobra stitch is to use approximately 1 foot of paracord for every 1 inch of your wrist circumference.
- Add Extra for the Closure: This is critical for buckle-less designs.
- For Adjustable Sliding Knots: Add at least an extra 1-2 feet to the main weaving cord, or factor in separate, shorter cords specifically for the sliding knot mechanism (as detailed in Method 1 below).
- For Loop and Stopper Knot: Add an extra 1-2 feet to allow ample cord for creating a substantial stopper knot.
- Example: For a 7-inch wrist using the Loop and Stopper method, you’d start with 7 feet (for the weave) + 2 feet (for the closure) = approximately 9-10 feet of paracord. It’s always better to cut slightly more cord than you think you need; trimming excess is easy, but adding length is impossible.
- Cut and Seal: Cut your paracord cleanly. Immediately use the lighter to carefully melt the cut end. Briefly touch the molten end (carefully, it’s hot!) with the flat metal side of the lighter or another non-flammable tool to create a smooth, sealed tip. Repeat for all cut ends. This prevents fraying and makes weaving much easier.
The Core: Choosing Your Weave
While this guide focuses on the closure, the main body of your bracelet is formed by a weave or knot pattern. Popular choices include:
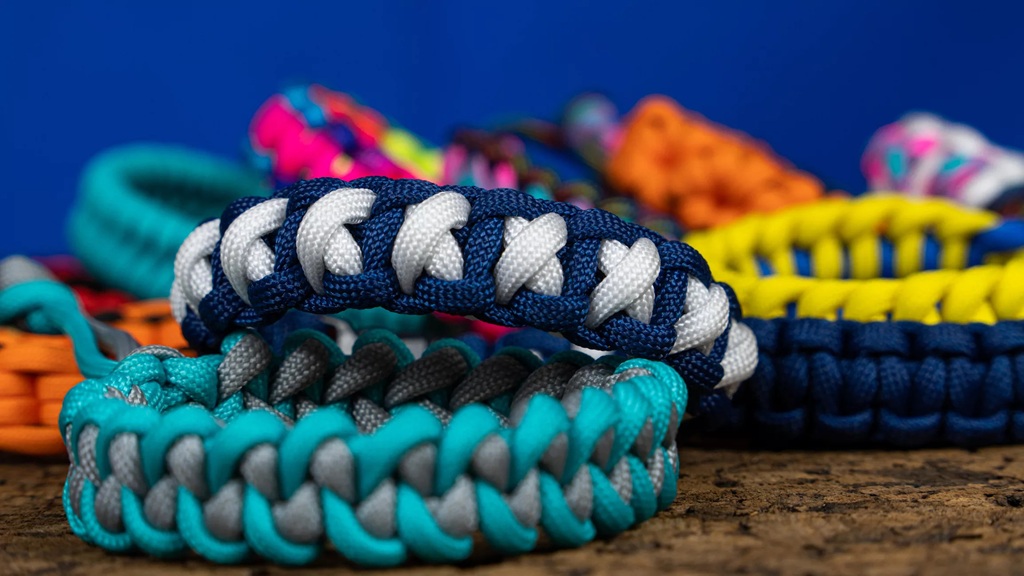
- Cobra Stitch (Solomon Bar): The most common and foundational paracord bracelet weave. Easy to learn and creates a sturdy, classic look.
- King Cobra: Essentially weaving a second Cobra layer over an existing Cobra bracelet, making it much thicker and containing more cord.
- Fishtail: A flatter, slightly more intricate-looking weave.
- Simple Braids/Knots: For thinner bracelets, simple braids or repeating knot patterns can be used.
Most buckle-less closure techniques can be adapted to various weaves. For clarity, our step-by-step instructions will primarily use the Cobra stitch as the example weave, but feel free to substitute your preferred pattern once you understand the closure mechanics.
Method 1: The Adjustable Sliding Knot Closure (Mad Max Style)
This popular method creates a highly adjustable bracelet using two sliding knots, often Diamond knots, Lanyard knots, or even simple Stopper knots (like double overhands). It’s sometimes called the “Mad Max” closure. This specific approach uses two additional, shorter cords to form the adjustable straps, integrated at the start.
Materials:
- Main Weaving Cord (Calculated length based on wrist size, e.g., 7-9 feet for a 7-inch wrist Cobra weave)
- Two Adjustment Cords (Approx. 12-15 inches each)
Steps:
-
Prepare Cords:
Cut and seal the ends of all three cords (one long main cord, two shorter adjustment cords).
-
Find Centers:
Fold the long main cord exactly in half to find its center point. Do the same for one of the shorter adjustment cords.
-
Start the Setup:
- Lay the folded main cord down horizontally, with the loop on the left and the two loose ends on the right.
- Place the center of the folded adjustment cord underneath the main cord, about an inch or two down from the main cord’s loop.
- You now have the main loop, two main cord strands running horizontally, and two adjustment cord strands running vertically underneath them.
-
Secure Adjustment Cord:
Tie a few tight Cobra stitches using the main cord strands around the adjustment cord strands. This anchors the adjustment cord, which will form one side of your sliding closure. Weave about 1/2 inch to 1 inch of Cobra stitches.
-
Incorporate Second Adjustment Cord:
Lay the second short adjustment cord parallel to the first one, sandwiched between the two main cord strands you are weaving with. Continue the Cobra weave, now enclosing both short adjustment cords within the core of the weave for another 1/2 inch or so. This secures the second adjustment strap.
-
Form the Bracelet Core:
Now, bring the two ends of the first adjustment cord (the one you initially secured) up and lay them parallel to the two main cord strands. These four strands (2 main, 2 from the first adjustment cord) will now form the core of your bracelet. The second adjustment cord should be dangling free for now.
-
Weave the Bracelet Body:
Continue weaving the Cobra stitch (or your chosen weave) using the two long ends of the main cord around this four-strand core. Weave until the bracelet reaches your desired length, remembering it needs to wrap around your wrist.
-
Finish the Weave:
Once the woven section is long enough, carefully cut the two working ends (the ones you were weaving with) close to the bracelet body. Seal the ends neatly with the lighter, pressing them flat against the weave.
-
Create the Sliding Knots:
You should now have the woven bracelet body with two loops sticking out from the start (formed by the second adjustment cord) and two loose ends sticking out from the end (the ends of the first adjustment cord that formed part of the core).
- Take the two loops from the start. Pass the two loose ends from the finish through these loops.
- Now, tie a stopper knot on each of the loose ends. Simple overhand knots or double overhand knots work well. Ensure these knots are large enough so they cannot slip back through the loops they just passed through. The classic method uses Diamond Knots or Lanyard knots here for a more decorative and secure finish, though they are more complex to tie.
- Alternatively, and perhaps simpler for adjustment, use the two loose strands from one end to tie a sliding knot (like two wraps of a Double Fisherman’s knot or opposing overhand knots) around the loop strands from the other end, and vice-versa. This creates two knots that slide along the opposing strands/loops to adjust the size.
-
Trim and Seal:
Cut off any excess cord just past your sliding/stopper knots and carefully seal the ends with the lighter.
Your adjustable buckle-free bracelet is complete! Slide the knots apart to loosen and together to tighten.
Related: Craft Your Style: A Beginner’s Guide to Making String Bracelets (DIY)
Method 2: The Loop and Stopper Knot Closure
This is a simpler, non-adjustable method that creates a fixed-size bracelet secured by passing a large knot through a loop. It’s elegant and very secure if sized correctly.
Materials:
- One continuous length of paracord (Calculated length + extra for knot, e.g., 9-10 feet for a 7-inch wrist Cobra weave)
Steps:
-
Find Center & Form Loop:
Fold your single length of paracord exactly in half. At the folded end (the center point), measure down about 1/2 to 3/4 inch and tie a simple overhand knot using both strands. This creates a small, secure loop at the top. Alternatively, simply hold the center point and start weaving just below it, treating the folded end itself as the loop. The size of this loop should be just large enough for the eventual stopper knot to pass through snugly.
-
Identify Core & Working Strands:
The loop forms the top. The two long strands coming down from the loop are your working ends. For weaves like the Cobra, you often need core strands. You can either use the loop itself as the anchor (weaving around the two strands descending from it), or lay the loop at the top and designate two other strands as the core if using a multi-cord setup (less common for this closure). For a simple Cobra with this closure, treat the two strands coming directly from the base of your starting loop/knot as the core strands temporarily.
-
Start Weaving:
Begin your chosen weave (e.g., Cobra stitch) just below the loop/starting knot. Place the left working strand over the core strands. Place the right working strand over the left working strand. Pass the right working strand under the core strands and up through the loop created by the left strand. Pull tight. Now mirror the process: right strand over the core, left strand over the right, left strand under the core and up through the right loop. Pull tight.
-
Continue Weaving:
Repeat the weave, alternating sides, down the length of the core strands until the bracelet is the correct length to fit comfortably around your wrist, including the loop section. Remember it shouldn’t be too tight, as the stopper knot needs space.
-
Prepare for Stopper Knot:
Once the woven section is complete, you will have the two working ends remaining. These will be used to tie the stopper knot.
-
Tie the Stopper Knot:
This knot needs to be large and secure enough to not pull through the starting loop easily. Good options include:
- Diamond Knot (Lanyard Knot): A classic, decorative, and very secure choice. It looks complex but is manageable with practice (tutorials readily available online).
- Matthew Walker Knot: Another handsome and secure multi-strand stopper knot.
- Large Overhand Knot: Tie a simple overhand knot using both strands together. To make it larger, pass the ends through the loop again before tightening (essentially a Double Overhand knot). Repeat if needed for more bulk.
- Button Knot (e.g., Celtic Button Knot): Various decorative button knots can serve as excellent stoppers.
- Ensure the knot is positioned so that when it’s passed through the starting loop, the bracelet fits your wrist perfectly.
-
Trim and Seal:
Once the stopper knot is tied securely and positioned correctly, trim the excess cord close to the knot. Carefully melt and seal the ends with the lighter, pressing them smoothly against the knot base.
Your Loop and Stopper Knot bracelet is ready! To wear, simply pass the stopper knot through the loop.
Tips for Buckle-Free Bracelet Success
- Consistent Tension: Maintaining even tension throughout your weaving is crucial for a professional-looking, uniform bracelet. Not too tight, not too loose.
- Neat Knots: Practice your chosen closure knots (Sliding knots, Diamond Knot, etc.) beforehand. Neat, well-dressed knots look better and are more secure.
- Careful Searing: Melt ends carefully to avoid scorching the surrounding cords. Press the melted end flat quickly for a clean finish.
- Practice Makes Perfect: Don’t be discouraged if your first attempt isn’t flawless. Paracord crafting takes a little practice. You can always undo the weave and try again!
- Consider a Jig (Optional): While not essential, a jig can help hold the bracelet steady, especially for longer or more complex weaves, making tension control easier.
Customization Ideas
Once you’ve mastered the basics, get creative!
- Multiple Colors: Use two different colors of paracord for striking visual effects in your weave. You may need to fuse them carefully with the lighter or incorporate them strategically depending on the weave and closure.
- Micro Cord: Weave or wrap micro cord around the main bracelet for added detail and color accents.
- Beads and Charms: While slightly more complex, beads or charms can sometimes be incorporated into the weave or attached to the closure loops/knots (ensure they don’t compromise the closure’s function).
Related: Weaving Wonder: A Comprehensive Guide to DIY Plant Hanger Rope
People Also Ask (FAQs)
Q1: How much paracord do I really need for a bracelet without a buckle?
- A: The standard estimate is about 1 foot of cord per inch of finished bracelet length for a Cobra weave, plus extra for the closure. For adjustable sliding knots (Method 1 using extra cords), you need the main weaving cord plus two ~12-15 inch pieces. For the Loop and Stopper knot (Method 2), add at least 1-2 extra feet to the main calculation for tying the large knot. Always err on the side of having slightly too much cord.
Q2: Is a paracord bracelet without a buckle secure?
- A: Absolutely! When tied correctly, both the adjustable sliding knot method and the loop/stopper knot method are very secure. The strength relies on well-tied, properly dressed knots. The loop/stopper method is fixed, while the adjustable method relies on friction, which is very effective with paracord’s texture.
Q3: Can I make any buckle-less paracord bracelet adjustable?
- A: The primary adjustable method is the sliding knot closure (Method 1). The loop and stopper knot method (Method 2) results in a fixed-size bracelet. Some other niche techniques exist (like incorporating elastic or wire), but the sliding knot is the most common and purely cord-based adjustable option.
Q4: What are the best knots for a buckle-less closure?
- A: For adjustable closures: Double Fisherman’s knots, variations of strangle knots, or simple opposing overhand knots work well for the sliding mechanism. Diamond knots or Lanyard knots are often used as decorative stoppers on the adjustable ends. For loop/stopper closures: Diamond Knot, Matthew Walker Knot, large Double/Triple Overhand Knot, or Celtic Button Knots are excellent choices for the stopper.
Q5: How do you put on and take off a buckle-less paracord bracelet?
- A: For the adjustable sliding knot type, simply slide the knots apart to create a large enough opening to slip over your hand, then slide them towards each other to tighten on your wrist. For the loop and stopper knot type, manipulate the large stopper knot through the loop to fasten or unfasten it.
Q6: What are the main benefits of wearing a paracord bracelet?
- A: Beyond style, the primary benefit is utility. In an emergency, you can unravel the bracelet to access several feet of strong 550 paracord. This cord can be used for countless tasks: building shelter, making repairs, creating fishing line (using inner strands), first aid (splinting, tourniquet – use with caution and knowledge), securing gear, making fire bows, and much more. Many bracelets also incorporate mini compasses, whistles, or fire starters.
Conclusion: Tie One On!
Creating a 550 paracord bracelet without a buckle is a practical and enjoyable skill. It allows for greater comfort, potential adjustability, and a sleek, minimalist look that showcases pure cord craftsmanship. Whether you prefer the adaptability of the sliding knot closure or the elegant simplicity of the loop and stopper knot, mastering these techniques adds versatile options to your paracord repertoire.
Beyond the satisfaction of making something unique with your own hands, you’re also crafting a potentially life-saving tool that’s always within reach. So grab some cord, practice those knots, and enjoy the process of making your own custom, buckle-free paracord bracelet!