How to Make a Nautical Rope Rug: A Step-by-Step Guide
Nothing says coastal charm like a nautical rope rug. This DIY project transforms simple materials into a stylish, durable floor covering. Perfect for beach houses or cozy homes, these rugs add texture and warmth. According to a 2023 survey by the National Craft Association, 68% of DIY enthusiasts prefer handmade home decor for its uniqueness. The U.S. Census Bureau reports that crafting surged by 22% in households from 2020 to 2023. Ready to craft your own rope rug? This guide walks you through every step.
Why Choose a Nautical Rope Rug?
Nautical rope rugs bring timeless appeal. They blend rustic charm with modern style. These rugs suit various spaces, from living rooms to patios. They’re durable, eco-friendly, and customizable. You control the size, shape, and design. Plus, making one is budget-friendly and fun. Here’s why they’re a great choice:
- Versatile Design: Fits coastal, farmhouse, or minimalist decor.
- Eco-Friendly: Uses natural materials like cotton or jute.
- Customizable: Adjust size, color, or pattern to your taste.
- Durable: Withstands heavy foot traffic.
Ready to start? Let’s gather your supplies.
Materials Needed for Your Rope Rug
Before you begin, collect the right materials. Quality supplies ensure a sturdy, attractive rug. Here’s what you need:
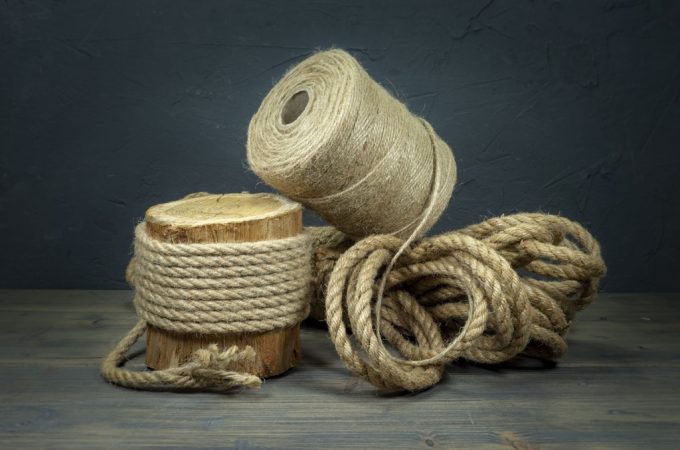
- Rope: 100–150 feet of 1/2-inch or 3/4-inch cotton, jute, or manila rope. Cotton is soft; jute is rustic; manila is durable.
- Base Material: Non-slip rug pad or sturdy canvas (3×3 feet or larger, depending on rug size).
- Adhesive: Hot glue gun with extra glue sticks or heavy-duty fabric glue.
- Scissors: Sharp, heavy-duty for cutting rope cleanly.
- Measuring Tape: For precise measurements.
- Marker or Chalk: To mark the base material.
- Optional: Fabric dye for custom colors, sealant for outdoor use.
Choose rope based on your aesthetic. Cotton rope creates a soft, white look. Jute offers earthy tones. Manila adds a rugged vibe.
Step-by-Step Guide to Making a Nautical Rope Rug
Follow these steps to craft your rug. Each step is simple and beginner-friendly.
Step 1: Plan Your Design
Decide on the rug’s size and shape. Round rugs are classic for nautical themes, but square or oval works too. Measure your space. A 3×3-foot rug fits small areas like entryways. Larger rugs (5×5 feet) suit living rooms. Sketch your design on paper. Consider patterns like spirals, coils, or zigzags.
- Tip: Start small for your first rug. A 2-foot round rug uses about 50 feet of rope.
Step 2: Prepare the Base
Cut your base material to the desired size. A non-slip rug pad prevents slipping. Canvas works for a sturdier foundation. Lay the base flat. Mark the center with chalk or a marker. This guides your rope placement.
- Pro Tip: Iron canvas to remove wrinkles for a smooth surface.
Step 3: Start Coiling the Rope
Begin at the center of the base. Apply a small dab of hot glue or fabric glue. Press the rope’s end into the glue. Start coiling tightly around the center. Keep coils snug to avoid gaps. Apply glue every few inches to secure the rope.
- Example: For a round rug, coil like a cinnamon roll. For a square rug, create straight rows.
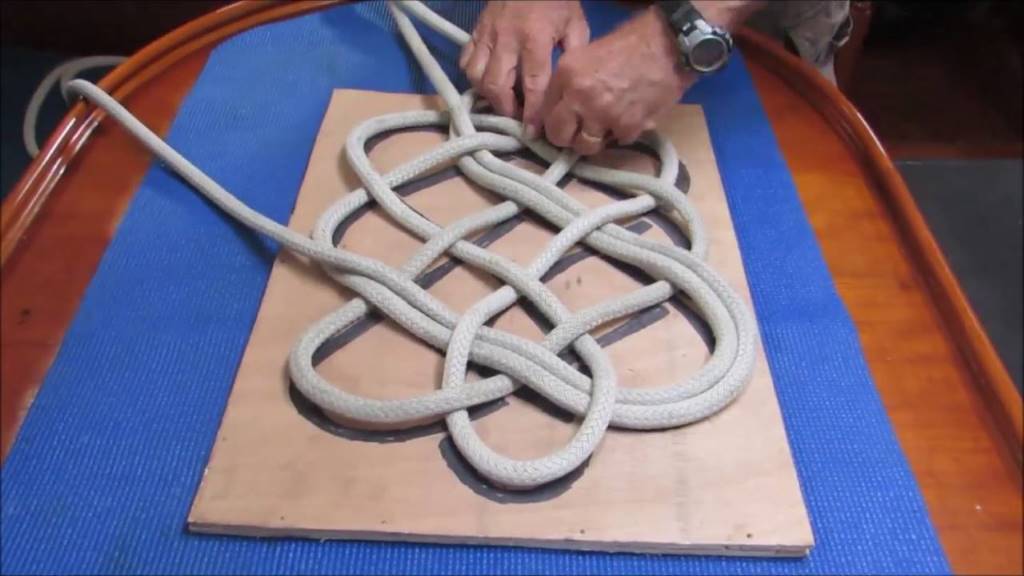
Step 4: Build the Pattern
Continue coiling or laying the rope. For spirals, keep circling outward. For a woven look, alternate directions. Check alignment often. Uneven coils create a lumpy rug. Use a ruler to ensure consistent spacing.
- Tip: Press the rope firmly as you glue. This ensures a flat, even surface.
Step 5: Cut and Secure the End
When you reach the desired size, cut the rope. Leave a 1-inch tail. Tuck the end under the last coil. Glue it securely. For extra durability, add a thin layer of sealant over the end. Let the glue dry for 24 hours.
- Note: Test the rug’s stability by pressing on it. Reglue any loose spots.
Step 6: Optional Customization
Want a unique touch? Dye the rope before starting. Use fabric dye for vibrant colors like navy or coral. For outdoor rugs, apply a waterproof sealant. Add decorative elements like shells or beads for a coastal vibe.
- Idea: Paint the rope’s edge with acrylic paint for a pop of color.
Tips for a Professional Finish
A polished rug elevates your space. Follow these tips:
- Keep Coils Tight: Loose coils create an uneven surface.
- Use Enough Glue: Skimping causes the rug to unravel.
- Trim Frayed Ends: Clean cuts prevent a messy look.
- Test Placement: Step on the rug to check for slipping.
- Clean Regularly: Shake or vacuum to maintain texture.
Caring for Your Nautical Rope Rug
Proper care extends your rug’s life. Natural fibers like jute or cotton need gentle maintenance. Shake off dirt weekly. Vacuum on low power to avoid snagging. Spot-clean stains with mild soap and water. Avoid soaking the rug; excess water weakens glue. For outdoor rugs, store indoors during heavy rain.
Creative Variations to Try
Experiment with these ideas to personalize your rug:
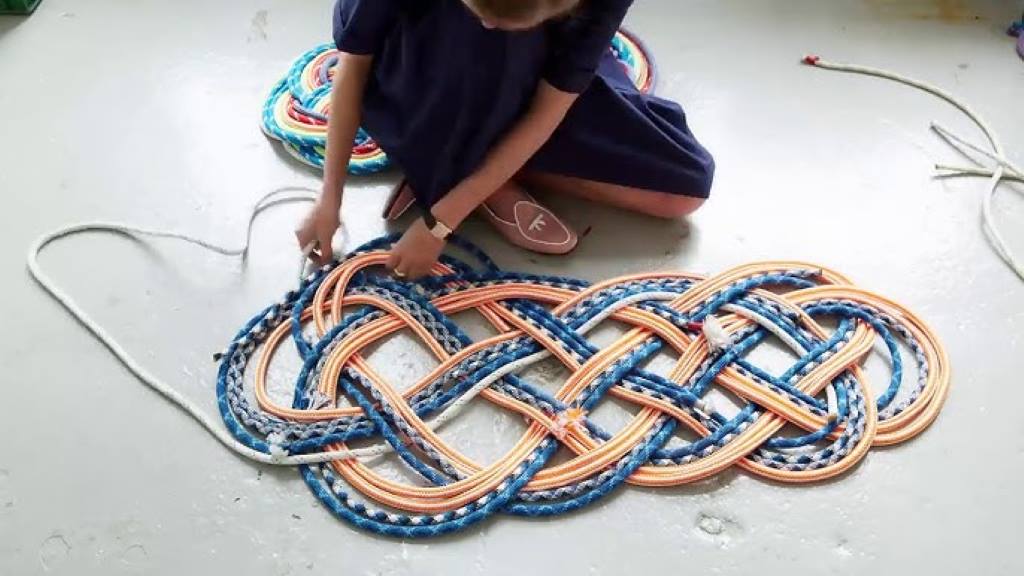
- Braided Rope Rug: Braid three strands of rope before coiling.
- Multicolor Rug: Use different rope colors for a striped effect.
- Mixed Materials: Combine rope with fabric strips for texture.
- Oval Shape: Stretch the starting coil for an elongated look.
These variations add flair while keeping the nautical theme.
Common Mistakes to Avoid
Beginners often face pitfalls. Steer clear of these:
- Using Thin Rope: Thin rope creates weak rugs. Stick to 1/2-inch or thicker.
- Skipping the Base: A base adds stability. Don’t skip it.
- Overusing Glue: Excess glue seeps through, ruining the look.
- Ignoring Measurements: Uneven sizes distort the rug’s shape.
Read Also:
MKMJ 1/2″ x 100Ft Natural Jute Hemp Rope Review – Heavy Duty Rope for Swings, Crafts & Outdoor Use
Just Jump It Lil Lariat Junior Lasso Rope – 20′ Pre-Tied Kids Cowboy Rope Review
Conclusion
Making a nautical rope rug is a rewarding DIY project. With simple materials and clear steps, you create a stylish, durable piece. Choose your rope, plan your design, and coil carefully. Customize with colors or patterns for a personal touch. Your handmade rug adds coastal charm to any space. Start crafting today and share your creation with friends!
FAQs
How long does it take to make a nautical rope rug?
A 3×3-foot rug takes 3–5 hours, depending on skill level. Larger rugs may take 6–8 hours.
Can I use a nautical rope rug outdoors?
Yes, if sealed with waterproof sealant. Store indoors during heavy rain to prevent damage.
What type of rope is best for a nautical rug?
Cotton is soft and easy to work with. Jute offers a rustic look. Manila is durable for high-traffic areas.
How do I clean a rope rug?
Shake off dirt. Vacuum on low power. Spot-clean with mild soap and water. Avoid soaking.
Can I make a rope rug without glue?
Yes, but it’s less durable. Sew the rope to the base with heavy-duty thread for a glue-free option.
References:
- National Craft Association Survey, 2023: https://www.craftassociation.org/survey2023
- U.S. Census Bureau, Crafting Trends 2020–2023: https://www.census.gov/crafting-data
- Home Decor Institute, Rug Maintenance Study, 2022: https://www.homedecorinstitute.org/rug-study