How To Cut Pro Manila Rope
Have you ever needed to split two pieces of pro manila rope? It’s an easy enough job, but if you’re unfamiliar with how to do it without cutting your fingers off in the process, this blog article is for you. Take a look at seven different methods on how to cut pro manila rope and find out which one is best suited for your needs.
What is Pro Manila Rope?
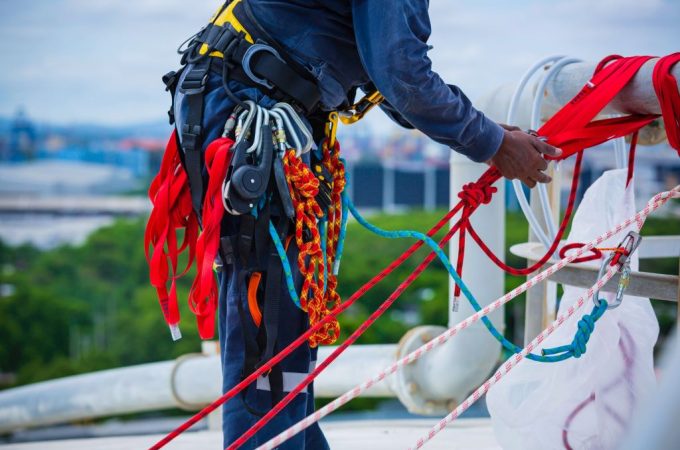
Pro Manila Rope is a type of climbing rope made from polyamide fiber. It is rated at 8mm and has a breaking strength of 700lb. The rope is also UV resistant.
How to Cut a Pro Manila Rope
Pro Manila Rope is a type of rope that is often used in climbing and rappelling. It is made of polyester and has a smooth finish. The rope is also resistant to rot and has a breaking strength of 550 kN/mm².

To cut a pro Manila rope, you will need the following supplies:
-A sharp knife
-A cutting mat
-A pair of gloves
-A piece of straight edge
-A tape measure
-A ladder
-An unsharpened knife or saw
-A hammer or mallet
1. Start by laying the rope out on the cutting mat so that it is perfectly straight. Make sure that all the edges are lined up so that the blade doesn’t get caught on anything during the cut.
2. Begin by using the unsharpened knife or saw to slowly cut the rope in half lengthwise. Make sure to keep a close eye on the blade so that it doesn’t catch on any hidden knots or fibers. If necessary, use your fingers to help guide the blade along the rope as you go.
3. Once you have cut the rope in half, it’s time to start folding it in on itself. You can do this by hand or by using a pair of gloves. Be sure to keep the rope as straight as possible while you’re doing this so that the fold lines are even.
4. Next, it’s time to start tying the ropes together. You can do this by using simple knots or by using more complex techniques such as clove hitch or figure-eight knot. Once all the ropes are tied together, it’s time to cut the extra loops off of the end of the rope.
5. Finally, it’s time to test out your new rope! Hang a weight from one end of the piece and see how it holds up under pressure. If everything looks good, you’re ready to go climbing!
The Best Tools for Cutting a Pro Manila Rope
There are a few different tools you’ll need to get the job done right.
The first thing you’ll need is a rope cutter. You can find these tools online or at any hardware store.
The second tool is a measuring tape. Make sure you have a good one, as it will be used to determine the correct length of the rope to be cut.
The third thing you’ll need is some experience with cutting ropes. If you’re not confident in your ability, find someone who is to help with the process.
Once you have all of your necessary tools, let’s take a look at how to use them:
1) Start by holding the measuring tape against the rope and mark where the ends of the tape intersect. This will be your starting point for cutting the rope.
2) Then, use your rope cutter to cut through the marked section of the rope. Be careful not to cut too close to either end of the measuring tape, or you may end up having to start over.
3) Once you’ve cut through the entire length of the rope, remove it from the cutter and discard it. You can now begin measuring and cutting the new rope.
4) Start by measuring the length of the new rope and cutting it to that length. Then, use your measuring tape to ensure that the ends of the rope are evenly spaced.
5) Once both ropes are cut to the correct length, tie them together using a simple knot. This will keep them from fraying and make your job a lot easier.
Types of Knots that can be tied with Pro Manila Rope
There are a few different knot types that can be tied with Pro Manila Rope.
The Bowline Knot is a simple knot that forms a loop in the line. To tie the Bowline Knot, make a loop with the rope by holding one end in your left hand and pulling the other end through the first loop. Keep the hands close together as you tighten the knot by pulling on both ends of the rope.
The Clove Hitch is another simple knot that can be used to secure objects or ropes. To tie the Clove Hitch, take a short piece of rope and hold it between your thumb and first two fingers. Make a small U-shape with your hand and put the end of the rope in the middle of the U. Now put your other hand on top of the first U, making sure that the end of the rope is now hanging down. Drive your thumb into the top side of the U, making sure that it’s tight enough to hold your hand in place. Now pull on both ends of the rope to create a clove hitch.
The Sheet Bend is a knot that can be used to create a loop in a rope. To tie the Sheet Bend, take one end of the rope and make a loop. Hold the loop between your thumb and first two fingers, then put the other end of the rope into the loop. Now poke your finger into the middle of the loop, and bend the sheet of rope around your finger. You now have a loop with two ends. Pull on both ends of the rope to tighten the knot.
Conclusion
If you’re looking to learn how to cut pro Manila rope, this guide is for you. In it, we’ll teach you the basics of this popular knot-tying technique and provide a few tips on how to get started. Whether you’re an experienced sailor or just starting out, learning how to cut pro Manila rope is a great way to improve your sailing skills. Thanks for reading!