How to Coil Climbing Rope?
Climbing rope is used for many purposes, including rappelling and rescue situations. In order to coil climbing rope properly, you need to first untwist it and then wind it into a neat circle. It’s important not to let your rope get tangled while coiling or else it will be difficult to use when you need it most. Here are steps on how to coil climbing rope:
Step 1: Put the end of the rope through the middle of the bottom loop
With the rope in position, pull up on it so that the bottom loop is taut. If it’s not a tight fit, open up the top of the coil and adjust accordingly. You want to make sure that when you pull on one end of this rope, all four strands go straight down into the center of each other (if your hands are positioned like mine are in this photo).
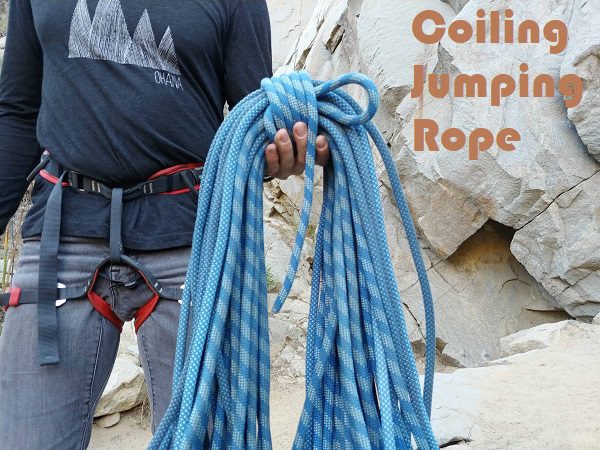
Step 2: Run the rope through your hand as you rotate it in a figure-eight pattern
The figure-eight pattern will ensure that the coils don’t stick together, which can happen if you just wrap them around each other in a circle.
When you’re done coiling, make sure that both ends are pointing up and out of the middle loop. Next, push the center loop down into the coil. This will make the rope more secure and prevent it from unraveling. And finally, pull on both ends of the rope to tighten everything up!
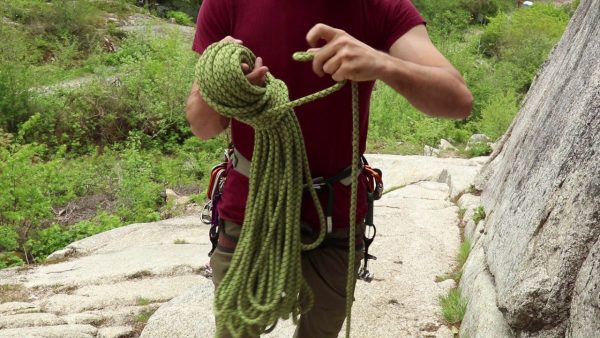
Step 3: Twist the rope coiling it from your hand to your shoulder, then back down to your hand again
The rope will twist and tighten, making it more secure. You can also use this method to make a chain out of rope if you want to hang something up! If you want to make a rope ladder, start by coiling the first section of the rope into a circle. Then take the end of another piece of rope and push it through the center loop. Now you can use this second piece as one side of your ladder.
Step 4: Fold the rope 50-50 lengthwise, to make it more manageable.
Next, fold the rope 50-50 lengthwise, to make it more manageable. You can also coil your rope by simply wrapping it around your hand before coiling; However, this is not as effective as folding it. This will prevent the tangling of the rope when you are climbing or rappelling down a cliff. You can also coil your rope by simply wrapping it around your hand before coiling.
Step 5: Coil the folded rope by crossing one side over the other
Fold the rope in half and then lay it down on a flat surface so that there are two equal lengths of rope. Cross one side over the other and twist the coil until it is fully twisted (you can use your hands if you find it easier than using your feet). Repeat this process until all ropes are coiled up neatly on your flat surface, then wrap them in a plastic bag to keep them fresh!
Step 6: Twist the coil until it is fully twisted
Once you have the rope twisted and wound around your arm, twist it until it is fully twisted. You can do this by hand, or you can use a stick to help with twisting. Be sure to keep your hand on top as you twist so that you don’t add too much pressure to any one part of the rope. The entire coil should be evenly twisted at this point, with no sections standing out in comparison to any other section. Make sure not to twist so tightly that it becomes difficult for someone else who will eventually be climbing with this climbing rope—it’s important not just for their safety but also so they’ll be able to get up on their own later!
Having a rope that is easy to the coil will make your life much easier, whether you’re hiking in the mountains or just planning on taking a nice long walk around your neighborhood. Here are some reasons why:
- You’ll be able to take a nice long hike with ease. If your rope is easy to coil, there’s no excuse not to head out for an adventure!
- Your rope will always be ready for use without any hassle. If you want to use it often, keeping it coiled up can save space in your backpack and ensure that it’s ready for action when you need it most!
- You won’t have trouble untangling yourself from the mess of loops at the end of each day—or even during breakfast if that’s how you roll!
Things to consider while coiling climbing rope
There are a few things to consider when you’re coiling climbing rope.
The first is whether or not you want to use a knot at the end of each loop. This is up to personal preference and will depend on what kind of climbing you’re doing as well as what kind of rope you have (and its weight).
The second is how you’ll store the rope between climbs. If you’re climbing on a multi-pitch route, then coiling up your rope as you climb—and untangling it at the end of each pitch—is probably the best way to go. This ensures that both ends of your rope are always attached to your harness, which can help prevent injuries if one strand breaks (as well as keeping those pesky loops from getting tangled up in each other).
The third and final way to coil your rope is by wrapping it around your body. This is called a body wrap, and it’s a great way to store your rope when you’re not climbing. It also makes for easy access when you do want to climb again—just untie the knot at one end of the coil and pull out as many loops as needed.
Conclusion
Climbing rope is a great way to keep fit and stay active. The best part about climbing rope is that it’s easy to learn, even for beginners! Once you’ve learned how to coil climbing rope though, there are so many different things you can do with it besides just taking a hike or going on an adventure through the woods!