How to Master Rope Techniques for Building Emergency Shelters Anywhere
Being caught outdoors without proper shelter is dangerous. A sudden storm, an unexpected injury, or a navigation mistake can leave you exposed to the elements fast. Knowing how to use rope correctly can save your life in these moments. It is one of the most practical survival skills anyone can learn.
This guide walks you through the essential rope techniques you need to build a reliable emergency shelter anywhere. Whether you are hiking in the mountains, camping in a forest, or caught in an urban crisis, these skills will serve you well.
Why Rope Skills Matter in Survival Situations
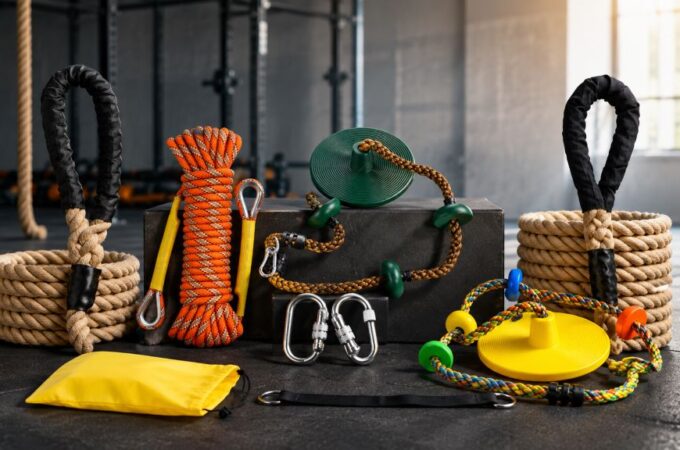
A rope is one of the most versatile tools in any survival kit. It can hold structures together, support weight, and anchor materials against strong wind and rain. However, a rope is only useful if you know how to work with it properly.
Many people carry paracord or utility rope on outdoor trips but never practice using it. Therefore, when an emergency strikes, they struggle to tie secure knots or build a stable frame. Learning these techniques before you need them makes all the difference.
Additionally, rope skills are not just for wilderness situations. Natural disasters, flooding, and power outages can leave people without shelter in urban areas too. A basic understanding of rope work prepares you for a wide range of emergencies.
Choosing the Right Rope for Emergency Shelter Building
Not all ropes are created equal. Before you practice any technique, you need to understand which type of rope works best for shelter construction.
Paracord, also known as parachute cord or 550 cord, is the most popular choice among survivalists. It is lightweight, strong, and compact enough to carry in a small bag. A single strand can hold up to 550 pounds of weight. Additionally, its inner strands can be separated for finer tasks like stitching or fishing.
Natural fiber ropes, such as jute or sisal, are heavier but easier to find in the wild. You can also make basic cordage from plant fibers if you have no rope at all. Knowing this option exists is valuable in a true emergency.
For most prepared hikers and campers, carrying at least 50 feet of paracord is a smart habit. This length gives you enough material to build a solid ridge line, secure anchor points, and lash support poles together.
The Foundation: Essential Knots You Must Know
Knots are the foundation of all rope work. Without knowing a few key knots, even the best rope becomes nearly useless. Fortunately, you only need to master a handful of knots to build a functional emergency shelter.
The Square Knot is used to join two pieces of rope together. It is simple, reliable, and easy to untie after use. Practice tying it until your hands can do it without thinking.
The Clove Hitch is one of the most important knots in shelter building. It attaches rope to a pole or branch quickly and holds under tension. Use it to secure ridge lines and support beams to trees or stakes.
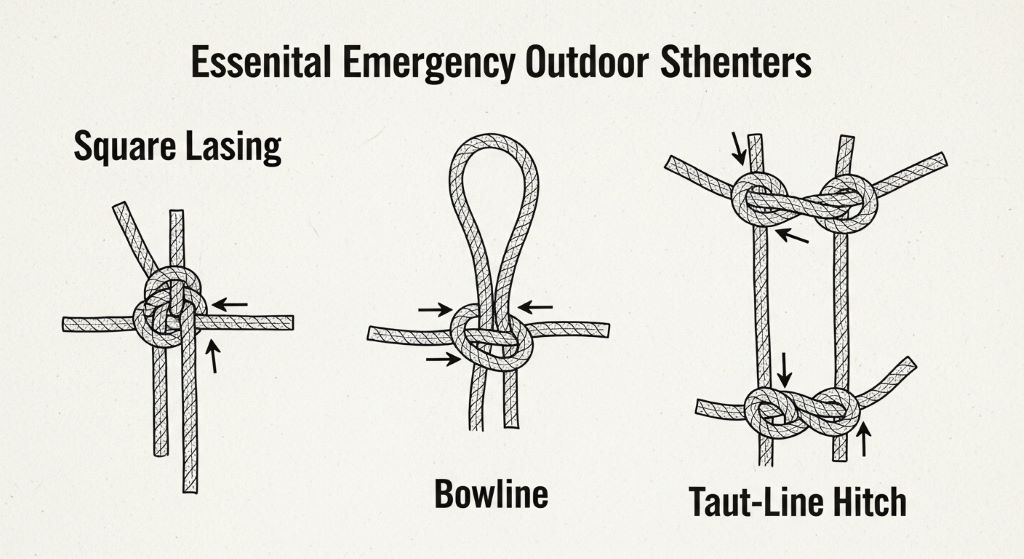
The Bowline creates a fixed loop that does not tighten under load. It is ideal for creating anchor points at the corners of a tarp or shelter. Additionally, it is easy to release even after bearing weight, which makes it practical in stressful conditions.
The Taut-Line Hitch is an adjustable knot that allows you to tighten or loosen a line without untying it. It is perfect for guy lines that hold the sides of a shelter down in wind.
The Timber Hitch is used to drag or attach rope to logs and heavy poles. If you are building a debris hut or a lean-to with large branches, this knot gives you control over heavy material.
Practice each of these knots regularly. Tie them in the dark, with cold hands, and under mild stress. Real emergencies rarely offer ideal conditions.
Building a Ridgeline: The Backbone of Any Shelter
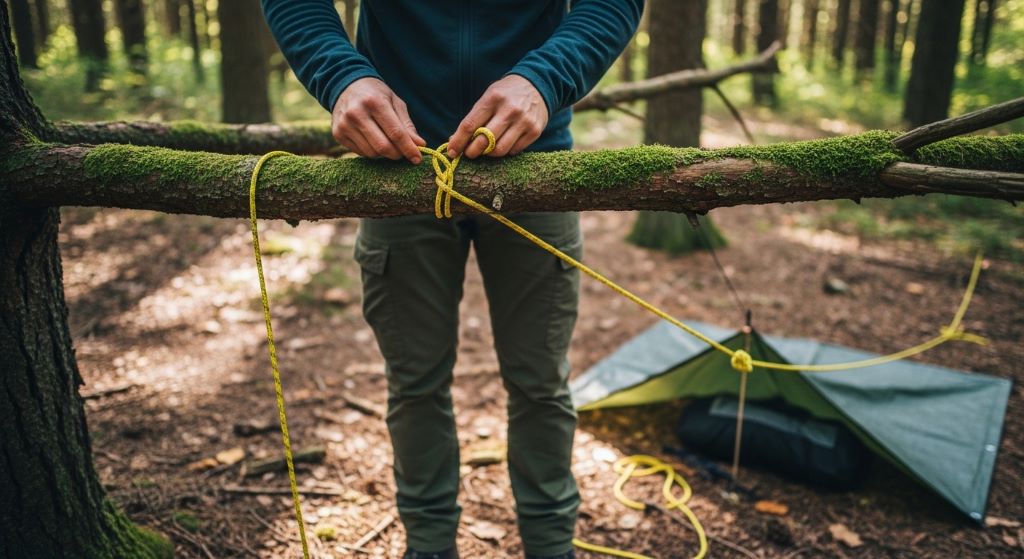
A ridgeline is a horizontal rope strung between two anchor points, usually trees. It acts as the spine of your shelter. Almost every temporary structure relies on a solid ridgeline.
To set one up, find two sturdy trees about eight to twelve feet apart. Tie one end of your rope to the first tree using a Clove Hitch at roughly chest height. Pull the rope across to the second tree and secure it using a Taut-Line Hitch. This allows you to adjust tension as needed.
The ridgeline should be taut but not overly tight. A slightly sagging line can snap under the weight of a tarp in heavy rain. However, an overly tight line can pull your anchor trees together and destabilize the whole structure. Finding the right tension comes with practice.
Once your ridgeline is in place, drape a tarp or emergency blanket over it. Pull the sides down at an angle and stake them to the ground using guylines attached with Bowline knots. This basic A-frame shelter protects you from rain and wind efficiently.
Lashing Techniques for Building Stronger Structures
Sometimes trees are not perfectly placed. In these situations, you need to build a freestanding frame using branches or poles. Lashing is the technique of binding two or more poles together using rope.
Square Lashing joins two poles at a right angle. Wrap the rope around both poles in a pattern that alternates direction, then finish with tight frapping turns between the poles. This creates a rigid joint that can support significant weight.
Diagonal Lashing is used when two poles cross at an angle other than ninety degrees. It is common in building A-frame structures or tripod supports. The technique follows the same principle as square lashing but adjusts to the angle of the poles.
Tripod Lashing ties three poles together at the top to create a free-standing support structure. This is useful when you have no trees nearby. Simply spread the legs of the tripod to achieve stability, then drape your shelter material over the top.
Therefore, mastering these three lashing types gives you the ability to build a shelter almost anywhere, regardless of the natural features around you.
Anchoring Your Shelter to the Ground
A shelter that blows away in the wind offers no protection. Anchoring your structure firmly to the ground is just as important as building it correctly.
Drive wooden stakes or thick branches into the ground at the corners of your shelter. Attach guylines from the shelter edges to these stakes using Taut-Line Hitches. Adjust each line until the shelter fabric is taut and the frame is stable.
If the ground is too hard for stakes, use heavy rocks or logs as anchors instead. Tie your guylines around them using a Timber Hitch. Additionally, burying a log horizontally in shallow soil and tying your line to it creates a surprisingly strong anchor called a deadman anchor.
In snowy conditions, fill a bag or stuff sack with snow, bury it a few inches deep, and attach your line to it. Snow compresses and freezes around the bag, creating a solid anchor point.
Adapting Your Rope Techniques to Different Environments
Every environment presents different challenges. However, the core rope techniques remain the same. What changes is how you apply them.
In a dense forest, trees are your best friend. Use them as natural anchor points and support beams. In open grasslands, you rely more on freestanding frames and ground anchors. In rocky terrain, use crevices and boulders to thread and tie your ropes securely.
Urban environments offer different materials. Fences, pipes, and structural beams can serve as anchor points. Additionally, ropes can be used to rig makeshift curtains, block doorways, or secure debris to create windbreaks in damaged buildings.
The principle is always the same. Look at your environment, identify stable anchor points, and apply the appropriate knot or lashing technique to connect your shelter material to those points.
Conclusion
Mastering rope techniques for emergency shelter building is a skill that rewards consistent practice. You do not need to memorize dozens of knots. Instead, focus on the five essential knots covered in this guide. Learn to build a solid ridgeline, apply basic lashing techniques, and anchor your shelter properly to the ground.
Additionally, take time to understand your environment. Every terrain offers different resources, but the core principles of rope work apply everywhere. A well-tied knot and a stable ridgeline can mean the difference between a miserable night and a safe one.
Therefore, start practicing today. Carry rope on every outdoor trip. Tie knots while watching television or waiting for a bus. The more automatic these skills become, the more confident and prepared you will be when it truly matters.
Frequently Asked Questions
- What is the best rope to carry for emergency shelter building?
Paracord, or 550 cord, is widely considered the best option. It is lightweight, strong, and compact. A 50-foot length is a practical amount to carry and gives you enough material for most emergency shelter situations.
- How many knots do I really need to know for survival shelter building?
You need to know five core knots: the Square Knot, Clove Hitch, Bowline, Taut-Line Hitch, and Timber Hitch. These cover almost every situation you will encounter when building an emergency shelter. Mastering a few knots well is far more useful than knowing many knots poorly.
- Can I make rope from natural materials if I have none?
Yes. Plant fibers from nettles, bark strips from certain trees, and twisted grass can all be used to create basic cordage. The process is time-consuming, but knowing how to do it is a valuable backup skill in a true survival emergency.
- How long does it take to build an emergency shelter using rope techniques?
A basic A-frame tarp shelter with a ridgeline can be set up in fifteen to thirty minutes with practice. A more complex freestanding structure using lashing techniques may take one to two hours. The more you practice, the faster and more confident you will become.
- Is it safe to build a shelter in stormy weather using only rope and a tarp?
Yes, if the shelter is properly anchored and the ridgeline is set at the correct tension. Use Taut-Line Hitches on all guylines so you can adjust tension quickly. Additionally, choose a sheltered location away from dead trees, exposed ridges, and flood-prone areas to maximize safety.
Related Topics:
How to Select Rope for Safety Harness Systems for Construction Safety Compliance
Faxco Twisted Cotton Rope 10ft Review: Strong Triple-Strand Tug of War Rope